$ help kill kill: kill [-s sigspec | -n signum | -sigspec] pid | jobspec ... or kill -l [sigspec] Send a signal to a job.
Send the processes identified by PID or JOBSPEC the signal named by SIGSPEC or SIGNUM. If neither SIGSPEC nor SIGNUM is present, then SIGTERM is assumed.
Options: -s sig SIG is a signal name -n sig SIG is a signal number -l list the signal names; if arguments follow `-l' they are assumed to be signal numbers for which names should be listed
Kill is a shell builtin for two reasons: it allows job IDs to be used instead of process IDs, and allows processes to be killed if the limit on processes that you can create is reached.
Exit Status: Returns success unless an invalid option is given or an error occurs.
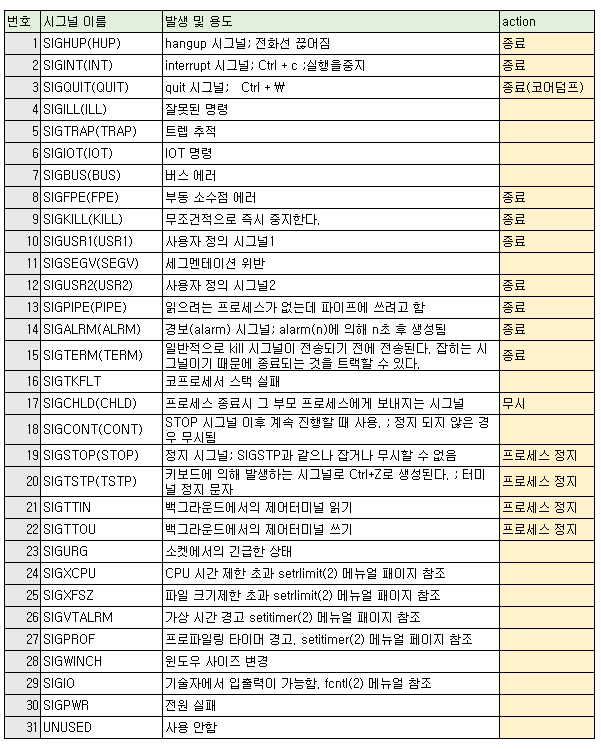
시그널(Signal) 종류 및 설명
리눅스 시그널 종류
trap을 이용한 Signal 처리 예제
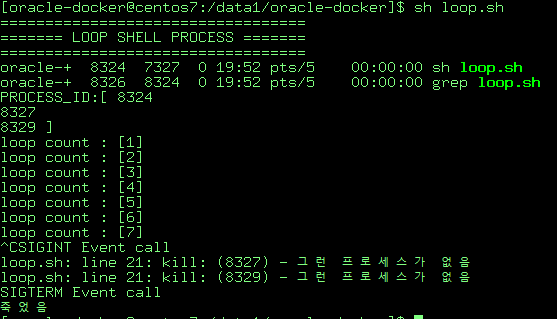
무한으로 수행되는 쉘 코드로 trap 을 이용한 시그널 처리 동작에 대해 알아보겠습니다.
소개하는 코드는 1 초마다 현재 수행되고 있는 loop.sh 프로세스를 확인하고
CTRL +C 시그널을 포착해서 프로그램을 종료하는 예제입니다.
loop.sh 수행 순서
while loop 수행 : loop count : [1]
사용자 CTRL+C (SIGINT:2 시그널 발생) => _int() 함수 호출 => kill -15 (SIGTERM ) 시그널 발생 =>_term() 함수 호출 => kill -9로 loop.sh 프로세스 종료
$ sudo systemctl status ssh [sudo] min의 암호: ● ssh.service - OpenBSD Secure Shell server Loaded: loaded (/lib/systemd/system/ssh.service; enabled; vendor preset: enabled) Active: active (running) since Sat 2022-03-19 11:26:10 KST; 22min ago Docs: man:sshd(8) man:sshd_config(5) Main PID: 4744 (sshd) Tasks: 1 (limit: 13936) Memory: 1.0M CGroup: /system.slice/ssh.service └─4744 sshd: /usr/sbin/sshd -D [listener] 0 of 10-100 startups
3월 19 11:26:10 min-server systemd[1]: Starting OpenBSD Secure Shell server... 3월 19 11:26:10 min-server sshd[4744]: Server listening on 0.0.0.0 port 22. 3월 19 11:26:10 min-server sshd[4744]: Server listening on :: port 22. 3월 19 11:26:10 min-server systemd[1]: Started OpenBSD Secure Shell server.
SSH 서버가 중지 상태일때 모습니다.
root@min-server:~# sudo systemctl stop ssh root@min-server:~# sudo systemctl status ssh ● ssh.service - OpenBSD Secure Shell server Loaded: loaded (/lib/systemd/system/ssh.service; enabled; vendor preset: enabled) Active: inactive (dead) since Sat 2022-03-19 11:53:01 KST; 3s ago Docs: man:sshd(8) man:sshd_config(5) Process: 6437 ExecStartPre=/usr/sbin/sshd -t (code=exited, status=0/SUCCESS) Process: 6438 ExecStart=/usr/sbin/sshd -D $SSHD_OPTS (code=exited, status=0/SUCCESS) Main PID: 6438 (code=exited, status=0/SUCCESS)
3월 19 11:52:33 min-server systemd[1]: Starting OpenBSD Secure Shell server... 3월 19 11:52:33 min-server sshd[6438]: Server listening on 0.0.0.0 port 22. 3월 19 11:52:33 min-server sshd[6438]: Server listening on :: port 22. 3월 19 11:52:33 min-server systemd[1]: Started OpenBSD Secure Shell server. 3월 19 11:53:01 min-server systemd[1]: Stopping OpenBSD Secure Shell server... 3월 19 11:53:01 min-server sshd[6438]: Received signal 15; terminating. 3월 19 11:53:01 min-server systemd[1]: ssh.service: Succeeded. 3월 19 11:53:01 min-server systemd[1]: Stopped OpenBSD Secure Shell server.
저는 앞으로 Docker 를 공부해 볼 계획이라 docker-test 계정을 생성하겠습니다.
테스트 절차는 아래 내용으로 진행 하겠습니다.
1. 테스트 계정 생성
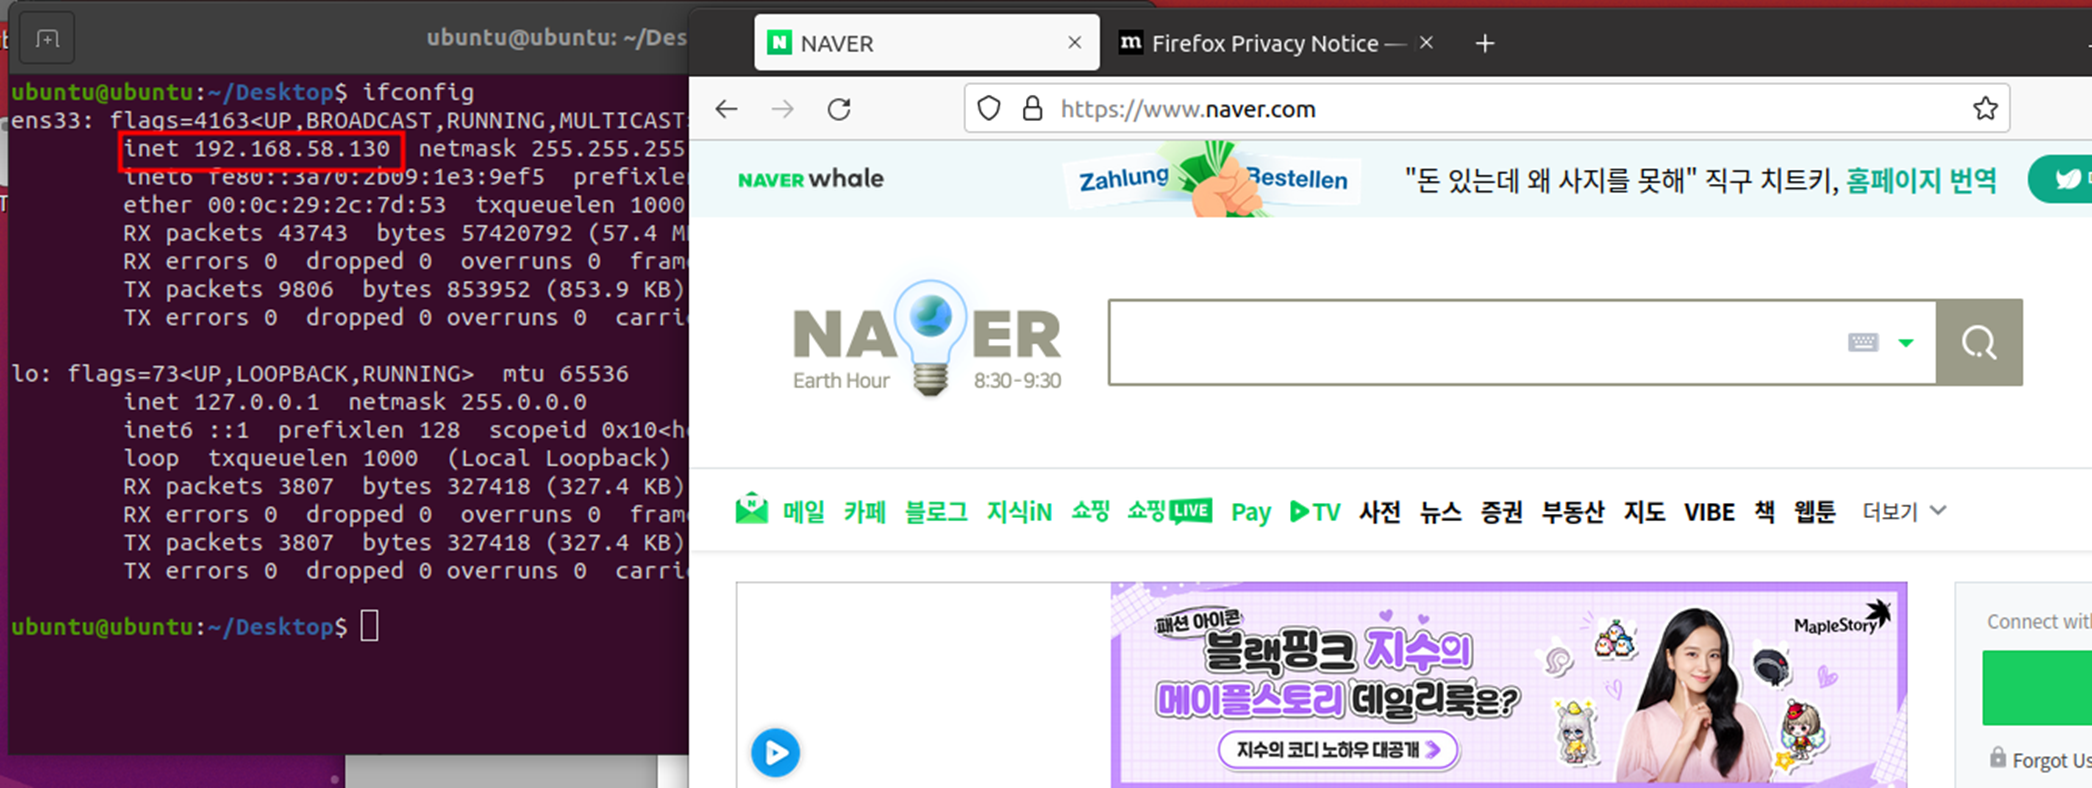
2. 우분투 서버 IP 정보 확인
3.리눅스 테스트 계정 접속
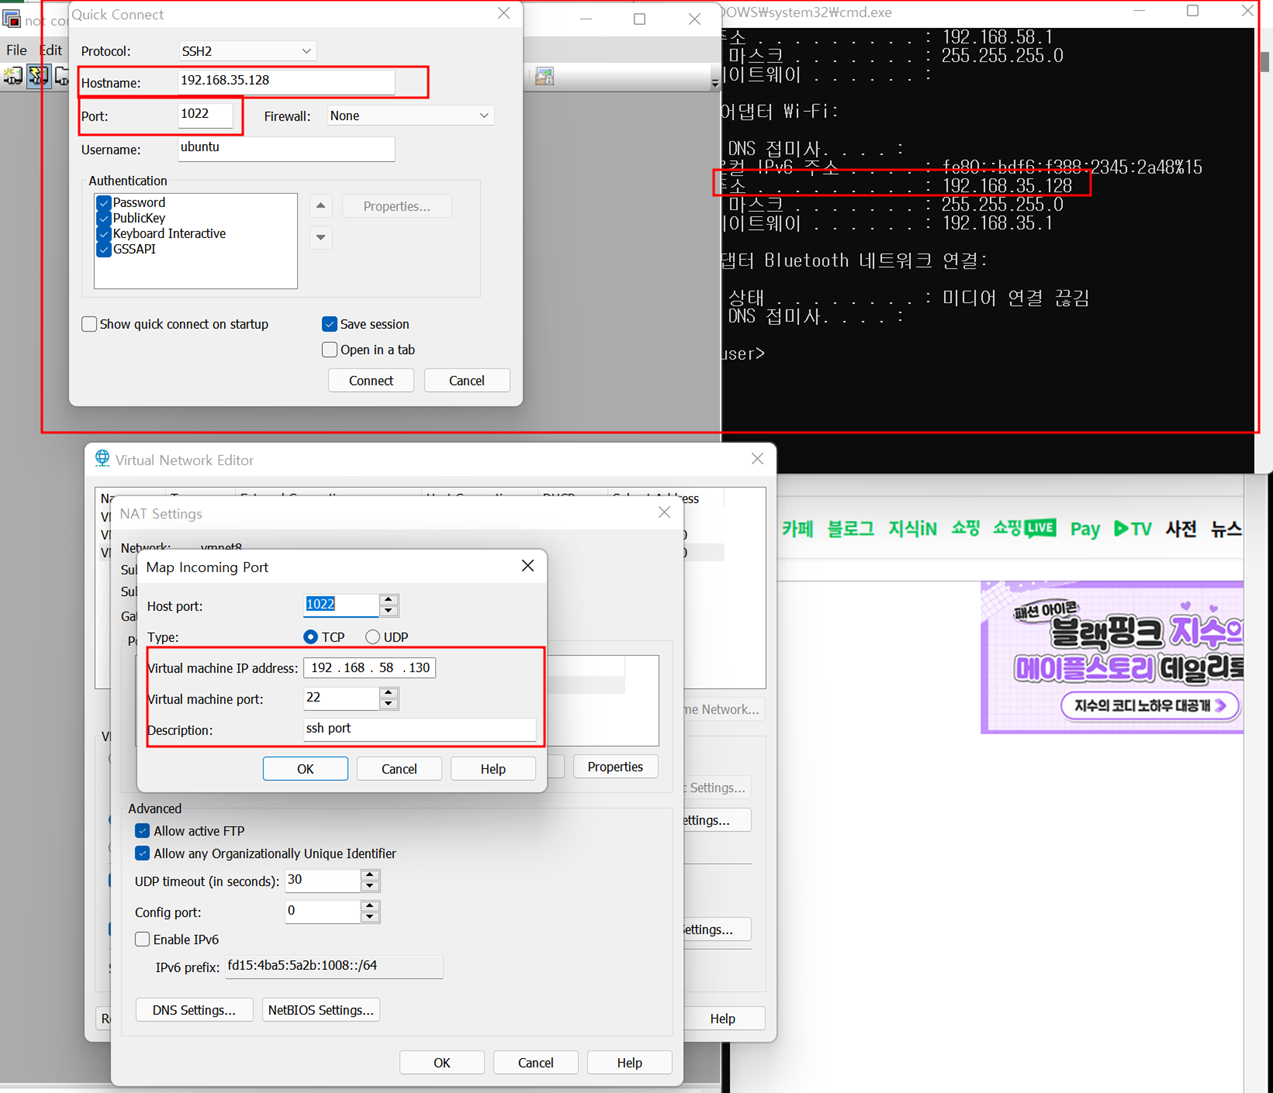
4. 리모트 서버(윈도우 노트북 -> 우분투 테스트 계정 접속)
테스트 계정 생성
# adduser docker-test 'docker-test' 사용자를 추가 중... 새 그룹 'docker-test' (1001) 추가 ... 새 사용자 'docker-test' (1001) 을(를) 그룹 'docker-test' (으)로 추가 ... '/home/docker-test' 홈 디렉터리를 생성하는 중... '/etc/skel'에서 파일들을 복사하는 중... 새 암호: 새 암호 재입력: passwd: 암호를 성공적으로 업데이트했습니다 docker-test의 사용자의 정보를 바꿉니다 새로운 값을 넣거나, 기본값을 원하시면 엔터를 치세요 이름 []: 방 번호 []: 직장 전화번호 []: 집 전화번호 []: 기타 []: 정보가 올바릅니까? [Y/n]
# ssh docker-test@180.64.82.103 The authenticity of host '180.64.82.103 (180.64.82.103)' can't be established. ECDSA key fingerprint is SHA256:sIwnjEfSdu/Pqb0jQwVrigRwrJUtTizyGrqu3Fjgjqg. Are you sure you want to continue connecting (yes/no/[fingerprint])? y Please type 'yes', 'no' or the fingerprint: yes Warning: Permanently added '180.64.82.103' (ECDSA) to the list of known hosts. docker-test@180.64.82.103's password: Welcome to Ubuntu 20.04.4 LTS (GNU/Linux 5.13.0-35-generic x86_64)
22 updates can be applied immediately. 추가 업데이트를 확인하려면 apt list --upgradable 을 실행하세요.
Your Hardware Enablement Stack (HWE) is supported until April 2025.
The programs included with the Ubuntu system are free software; the exact distribution terms for each program are described in the individual files in /usr/share/doc/*/copyright.
Ubuntu comes with ABSOLUTELY NO WARRANTY, to the extent permitted by applicable law.
리모트 서버(윈도우 노트북 -> 우분투 테스트 계정 접속)
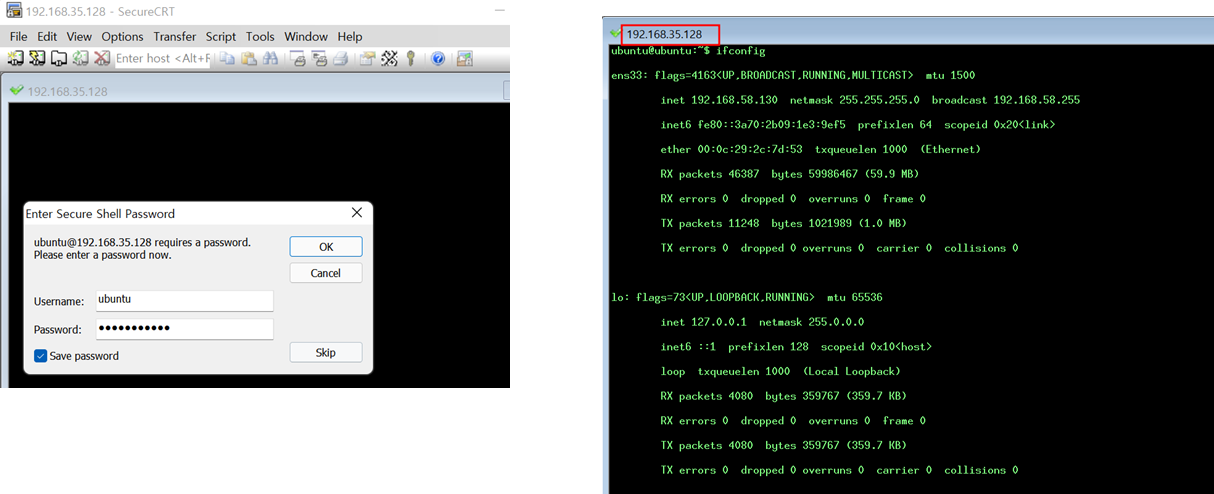
윈도우 노트북 SecureCRT 에서 우분투 접속을 하려고 하니 아래와 같은 에러가 발생합니다.
Key exchange failed. No compatible key exchange method. The server supports these methods: curve25519-sha256,curve25519-sha256@libssh.org,ecdh-sha2-nistp256,ecdh-sha2-nistp384,ecdh-sha2-nistp521,diffie-hellman-group-exchange-sha256,diffie-hellman-group16-sha512,diffie-hellman-group18-sha512,diffie-hellman-group14-sha256
/etc/ssh/sshd_config 를 수정 해서 문제를 해결하겠습니다.
vi /etc/ssh/sshd_config

KexAlgorithms +diffie-hellman-group1-sha1
Ciphers +aes128-cbc

systemctl restart sshd
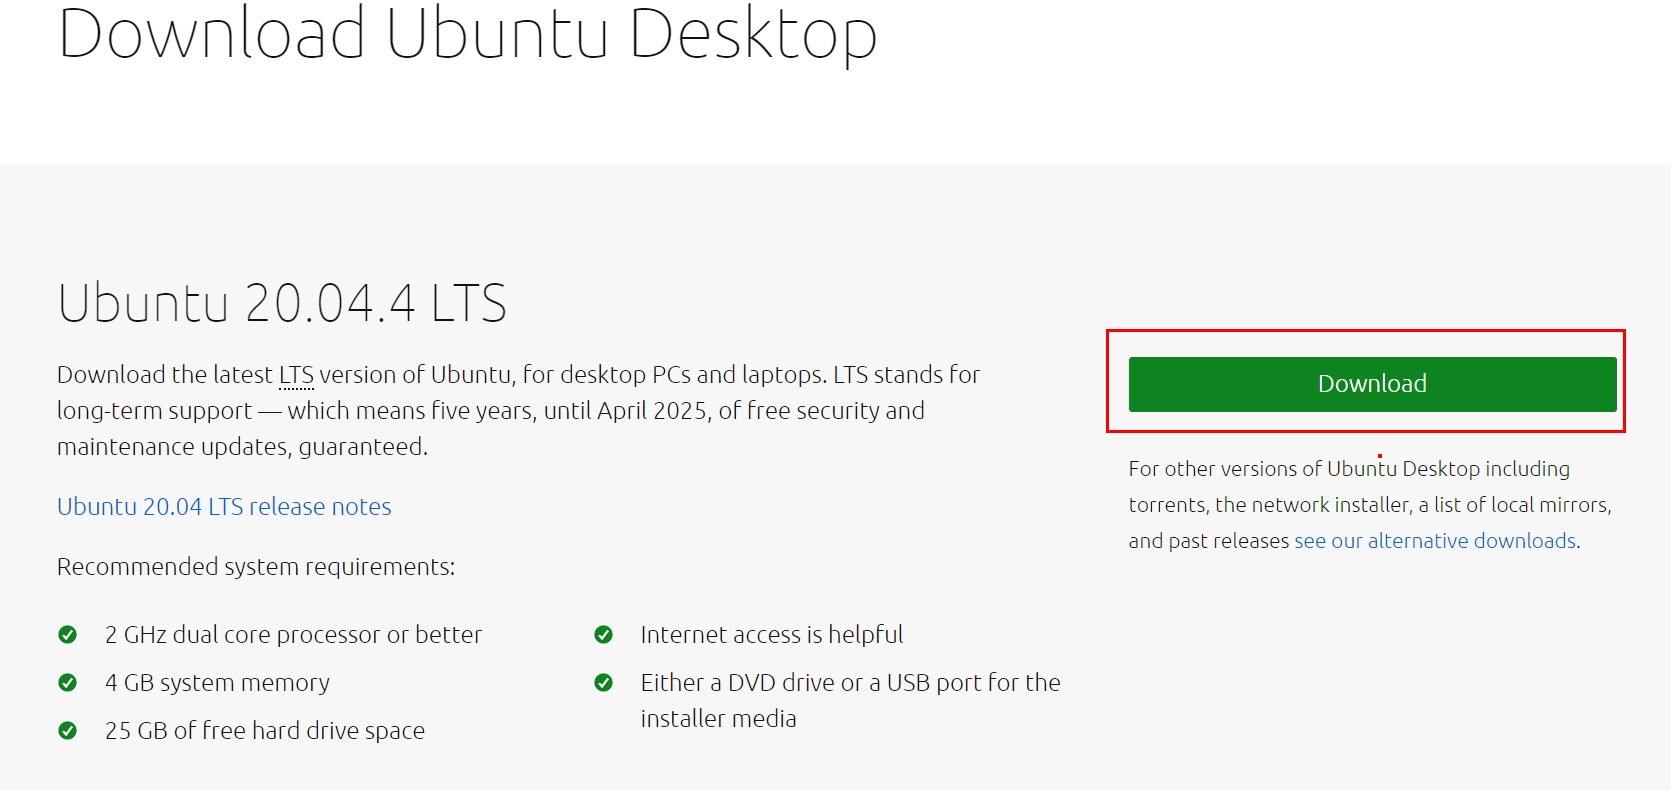
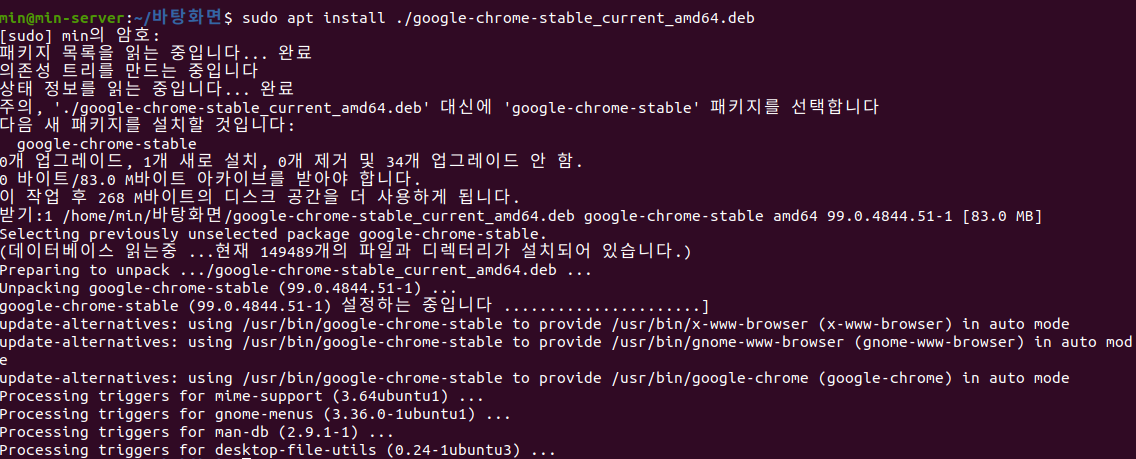
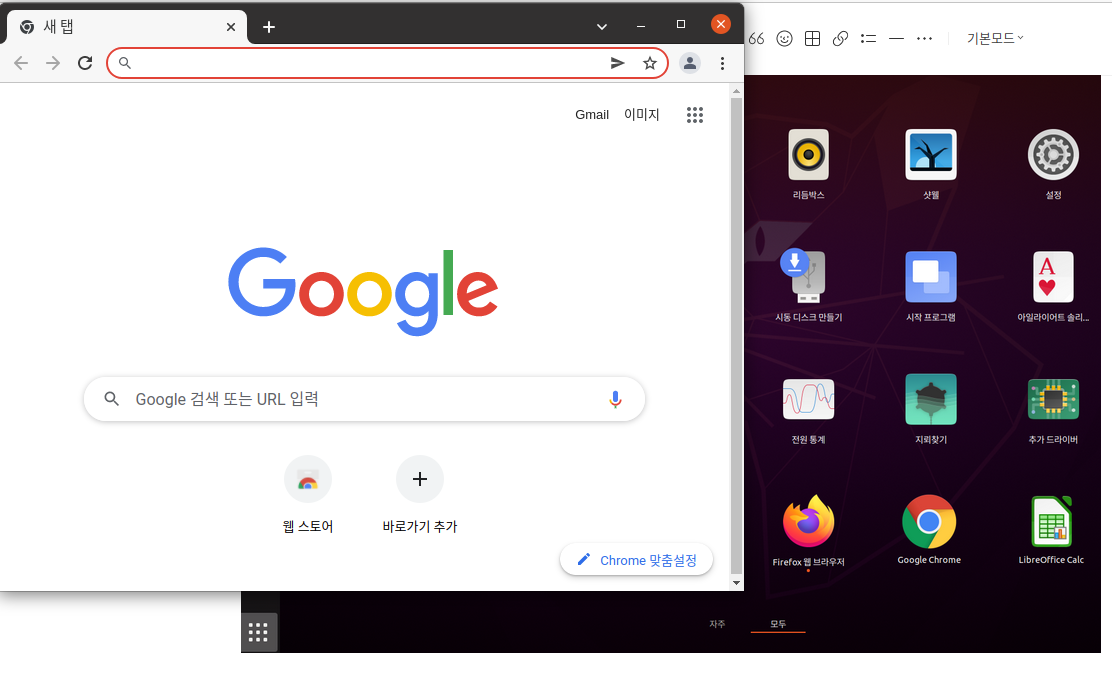
우부투(Ubuntu)설치시에 크롬은 기본 설치 되어 있지 않습니다. 기본 설치된 브라우저는 파이어 폭스가 설치 되어있습니다. 이번 포스팅에서는 Ubuntu 20.04.4 LTS 버전에서 크롬을 설치 하는 방법에 대해 알아 보겠습니다. * 우분투 버전 정보 확인 방법 $ lsb_release -a No LSB modules are available. Distributor ID: Ubuntu Description: Ubuntu 20.04.4 LTS Release: 20.04 Codename: focal
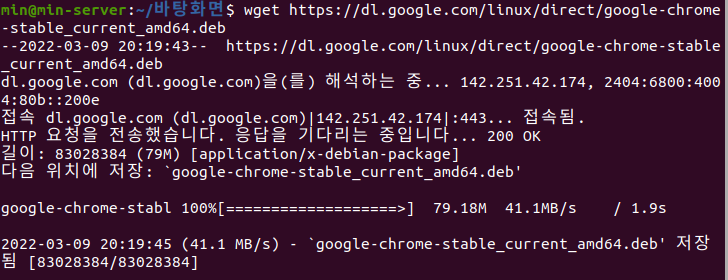
우분투 다운로드 (Ubuntu)
단축키(Ctrl+Alt+T) 또는 응용프로그램에서 터미널을 wget 명령을 이용해서 구글 크롬의 최신 .deb package 파일을다운로드 해야합니다.