728x90
반응형

Gitlab 사용시 자주 사용하는 다양한 명령어 사용법에 대해 작성한 글입니다.
Gitlab 버전 정보 확인
gitlab-rake gitlab:env:info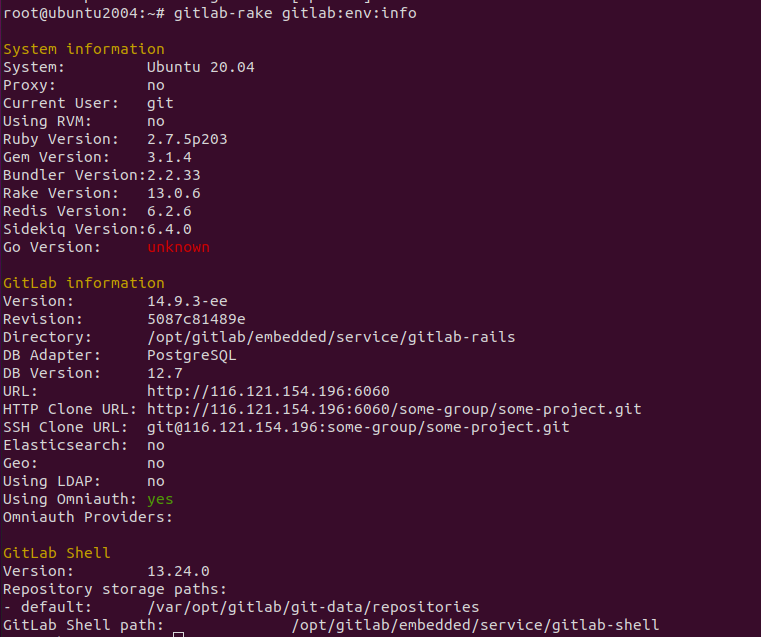
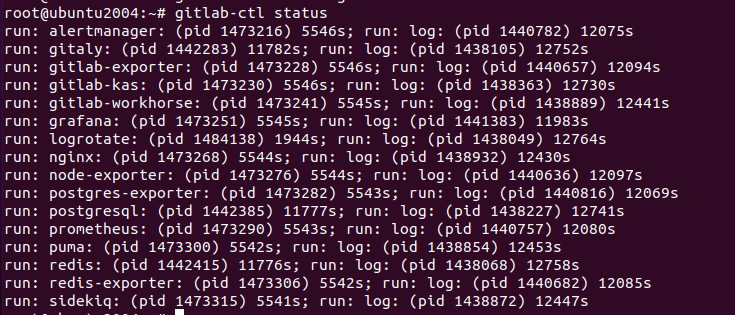
gitlab 서비스 상태 확인
gitlab-ctl statusroot@ubuntu2004:/var/log# gitlab-ctl status
run: alertmanager: (pid 1473216) 7764s; run: log: (pid 1440782) 14293s
run: gitaly: (pid 1442283) 14000s; run: log: (pid 1438105) 14970s
run: gitlab-exporter: (pid 1473228) 7764s; run: log: (pid 1440657) 14312s
run: gitlab-kas: (pid 1473230) 7764s; run: log: (pid 1438363) 14948s
run: gitlab-workhorse: (pid 1473241) 7763s; run: log: (pid 1438889) 14659s
run: grafana: (pid 1473251) 7763s; run: log: (pid 1441383) 14201s
run: logrotate: (pid 1493932) 562s; run: log: (pid 1438049) 14982s
run: nginx: (pid 1473268) 7762s; run: log: (pid 1438932) 14648s
run: node-exporter: (pid 1473276) 7762s; run: log: (pid 1440636) 14315s
run: postgres-exporter: (pid 1473282) 7761s; run: log: (pid 1440816) 14287s
run: postgresql: (pid 1442385) 13995s; run: log: (pid 1438227) 14959s
run: prometheus: (pid 1473290) 7761s; run: log: (pid 1440757) 14298s
run: puma: (pid 1473300) 7760s; run: log: (pid 1438854) 14671s
run: redis: (pid 1442415) 13994s; run: log: (pid 1438068) 14976s
run: redis-exporter: (pid 1473306) 7760s; run: log: (pid 1440682) 14303s
run: sidekiq: (pid 1473315) 7759s; run: log: (pid 1438872) 14665s
Gitlab Log 확인
gitlab 사용시 로그 확인 방법에 대해 알아봅니다.
gitlab 웹 로그 확인
/var/log/gitlab/gitlab-rails/production.log 에 로그가 남습니다. tail 로 실시간 로그를 확인 할수 있습니다.
tail -f /var/log/gitlab/gitlab-rails/production.log
root@ubuntu2004:~# tail -f /var/log/gitlab/gitlab-rails/production.log
Completed 200 OK in 34ms (Views: 0.5ms | ActiveRecord: 0.0ms | Elasticsearch: 0.0ms | Allocations: 814)
Started GET "/api/v4/geo/proxy" for 127.0.0.1 at 2022-04-16 12:36:37 +0900
Started GET "/-/metrics" for 127.0.0.1 at 2022-04-16 12:36:44 +0900
Processing by MetricsController#index as HTML
Completed 200 OK in 33ms (Views: 0.4ms | ActiveRecord: 0.0ms | Elasticsearch: 0.0ms | Allocations: 814)
Started GET "/api/v4/geo/proxy" for 127.0.0.1 at 2022-04-16 12:36:47 +0900
Started GET "/api/v4/geo/proxy" for 127.0.0.1 at 2022-04-16 12:36:57 +0900
Started GET "/-/metrics" for 127.0.0.1 at 2022-04-16 12:36:59 +0900
Processing by MetricsController#index as HTML
Completed 200 OK in 32ms (Views: 0.4ms | ActiveRecord: 0.0ms | Elasticsearch: 0.0ms | Allocations: 814)
Started GET "/api/v4/geo/proxy" for 127.0.0.1 at 2022-04-16 12:37:07 +0900
Started GET "/-/metrics" for 127.0.0.1 at 2022-04-16 12:37:14 +0900
Processing by MetricsController#index as HTML
Completed 200 OK in 36ms (Views: 0.5ms | ActiveRecord: 0.0ms | Elasticsearch: 0.0ms | Allocations: 814)
gitlab 서비스 로그 확인
gitlab-ctl tail 명령을 통해 gitlab 서버에서 남기는 각종 로그를 확인할수 있습니다.
- gitlab-ctl tail [service 명]
- 서비스명은 gitlab-ctl status 로 확인되는 서비스명입니다.
gitlab-ctl tail
gitlab-ctl tail postgresql
gitlab-ctl tail ngix
gitlab url 변경 방법
- 현재 저장소를 확인하고 변경된 주소로 지정 합니다.
git remote -v

git remote set-url origin https://gitlab.com/your-new-repo.git
728x90
반응형
'04.DevTools > Git&GitLab' 카테고리의 다른 글
| [GitLab] Project 삭제 방법 (0) | 2024.11.07 |
|---|---|
| [GitLab] git 빈 디렉토리 커밋 하는 방법 (0) | 2024.09.13 |
| [GitLab] 프로젝트 생성 및 관리 (0) | 2022.04.17 |
| [GitLab] GitLab 설치 방법 및 환경설정 (0) | 2022.04.16 |